Knowledge Base

How to Configure an email S/MIME certificate on Mozilla Thunderbird
After successfully collecting the certificate on your system, you then have to export it to a PFX/P12 format (from the browser you originally collected it to).
Once exported to the appropriate file format, follow the 'import' instructions in this document.
Importing your certificate into Mozilla Thunderbird
Importing your Certificate into Mozilla Thunderbird:
-
Open Thunderbird and click Tools > Options > Advanced
-
Click the Certificates tab
Optional - select Ask me every time under When a server requests my personal certificate.
Doing this alerts you to the fact that a server has requested identity confirmation and enables you to select your Sectigo Personal Authentication Certificate.
-
Click the View Certificates button.
-
In the Certificate Manager interface, make sure the Your Certificates tab is selected and click Import
-
Navigate to the location of your PKCS12 certificate file and enter any necessary passwords. Once complete, the certificate will appear in the certificate store.
-
Click OK
That's it. You have successfully imported your Sectigo Personal Authentication certificate into Mozilla Thunderbird.
-
Signing an email ensures the recipient knows the email has come from you and informs them that it has not been modified in transit.
-
Encrypting an email ensures that only the recipient can read the email content and attachments.
Note: In order to encrypt email, you must first have your recipient's email certificate in your certificate store. To obtain their certificate, you need to get your contact to send you a signed email. Upon receipt of the signed email, their certificate will be automatically imported into your certificate store and you will be able to sign/encrypt email to that person.
-
Open Thunderbird then click Tools > Account Settings
-
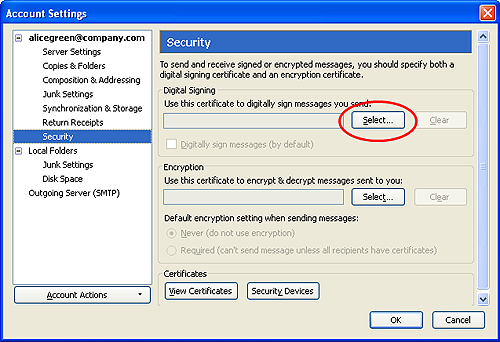
In the Account Settings dialog box, select Security
-
Click Select beside the text box in the Digital Signing area and select your Sectigo Personal Authentication certificate from the list.
-
Follow the same process for the Encryption section, selecting the same certificate
-
Click OK in the Account Settings interface to confirm your choice
Signing and encrypting individual mails:
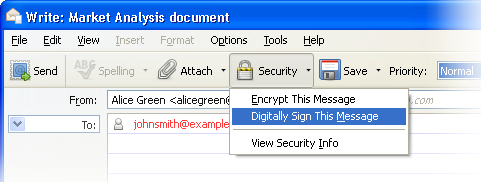
To sign an individual mail:
-
Compose your email and attach files as usual.
-
Click Security and choose Digitally Sign This Message.
-
Click the Send.
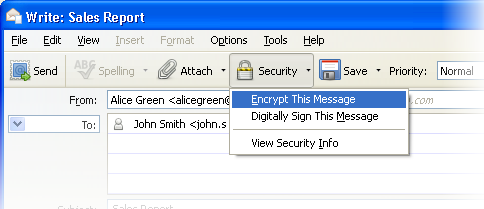
To encrypt an individual mail:
-
Compose your email and attach files as usual.
-
Ensure you have your contacts' email certificate and you have assigned the certificate to their entry in your contacts area.
-
Click Security and choose Encrypt This Message.
-
Click the Send.
Signing and Encrypting all mails by default:
-
Open Thunderbird then click Tools > Account Settings
-
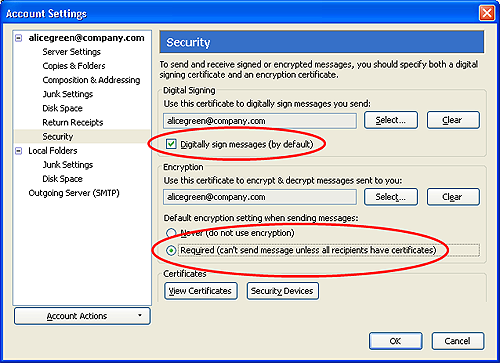
In Account Settings, select Security
-
Select the appropriate options in the 'Digital Signing' and 'Default Encryption Settings...' areas to sign and/or encrypt your mails by default.
-
As a rule of thumb, many users choose to digitally sign by default but only encrypt when sending a message which requires confidentiality.
-
Click OK